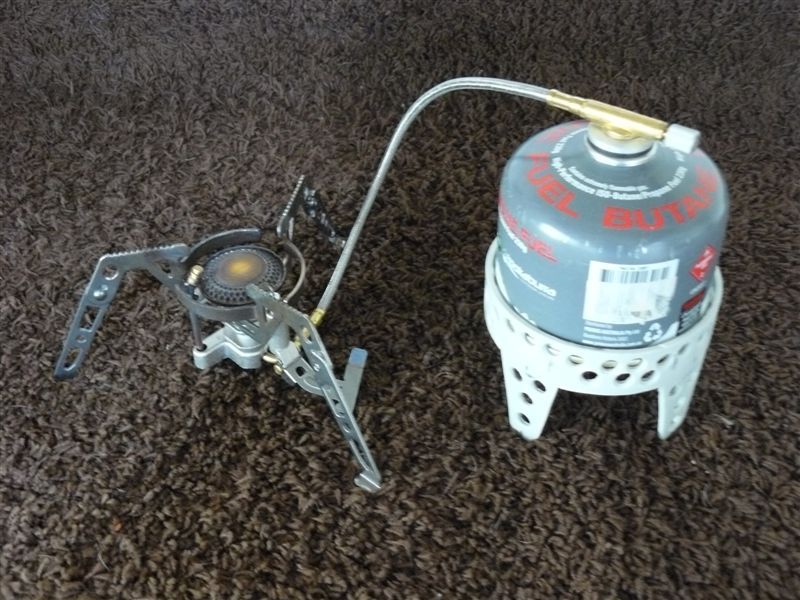
DIY : Remote cannister stove stand

Discussion about making bushwalking-related equipment.

DIY : Remote cannister stove stand

Postby sambar358 » Sun 12 Jan, 2014 12:19 pm

I have a Kovea Moonwalker & Spider remote cannister stoves and have been looking for some sort of a stand that will allow me to use the cannister inverted for cold-weather conditions as an alternative just to tipping it upside-down and sitting it on the cold ground or snow.

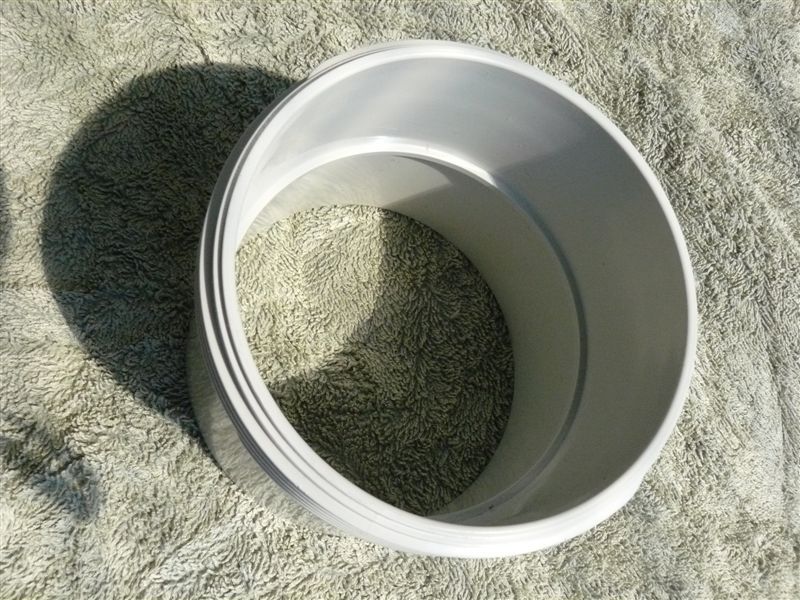
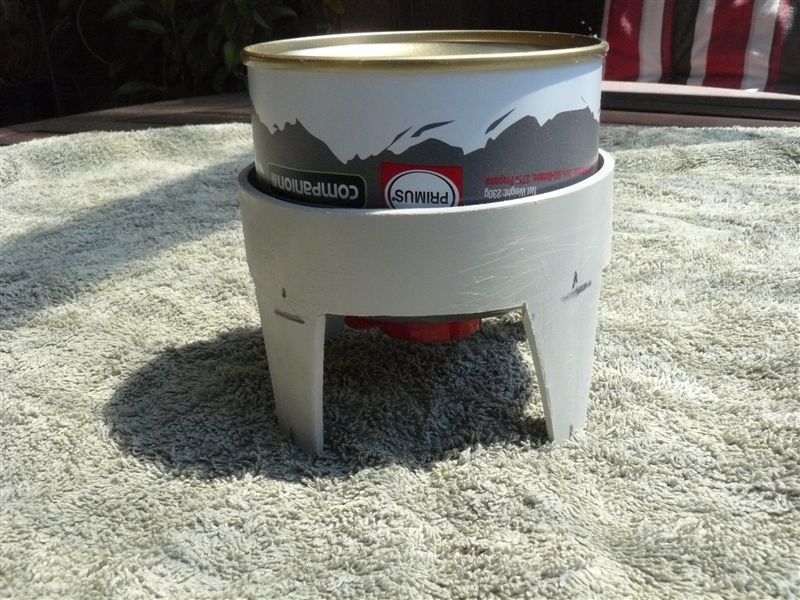
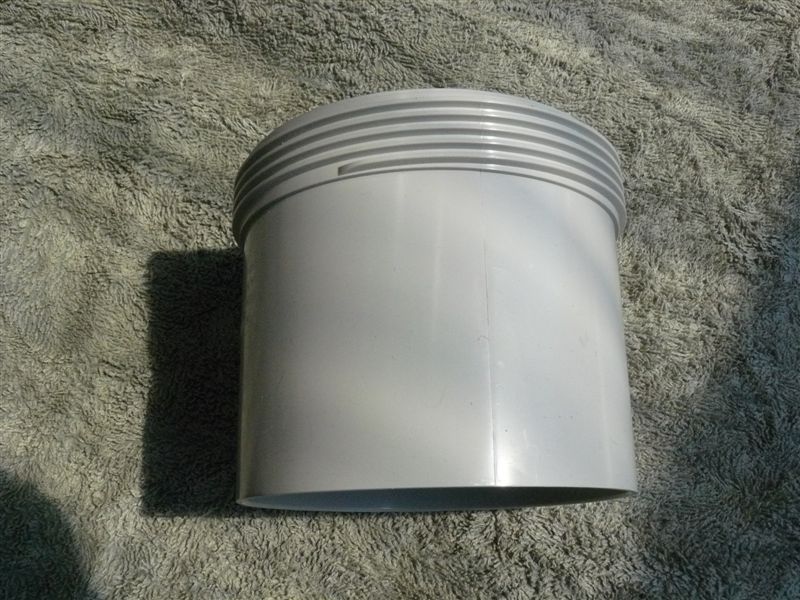
Whilst browsing thru the local plumbing supplies shop I found what looked like an ideal candidate for the job : a 100mm PVC pipe joiner used to join lengths of storm water pipe. It's ID is a couple of mm wider than the standard gas cannisters and it has a lip 1/2 way down the inside that the cannister can sit on in either the inverted or upright position. So I grabbed one for $3.50 and after a bit of a fiddle with the stove and connected cannister decided to go with a 4 leg stand with equal-sized cut-outs with the over-all design hopefully quite light while still being strong and stable.

Tools were pretty basic : my dremel multi-tool fitted with a small cut-off wheel (a fine toothed hacksaw or panel saw would also do), an electric drill and an 8mm twist bit and countersink bit, a tape measure and a permanent marker & some sandpaper.

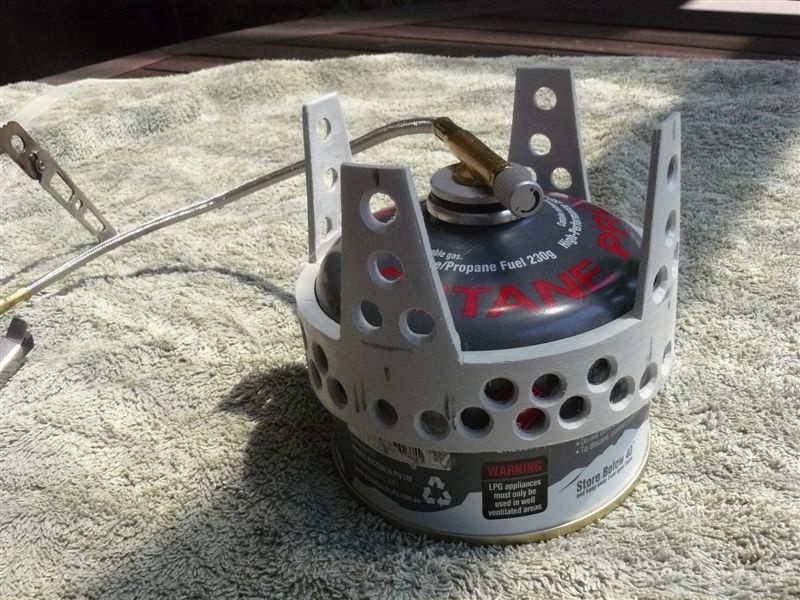
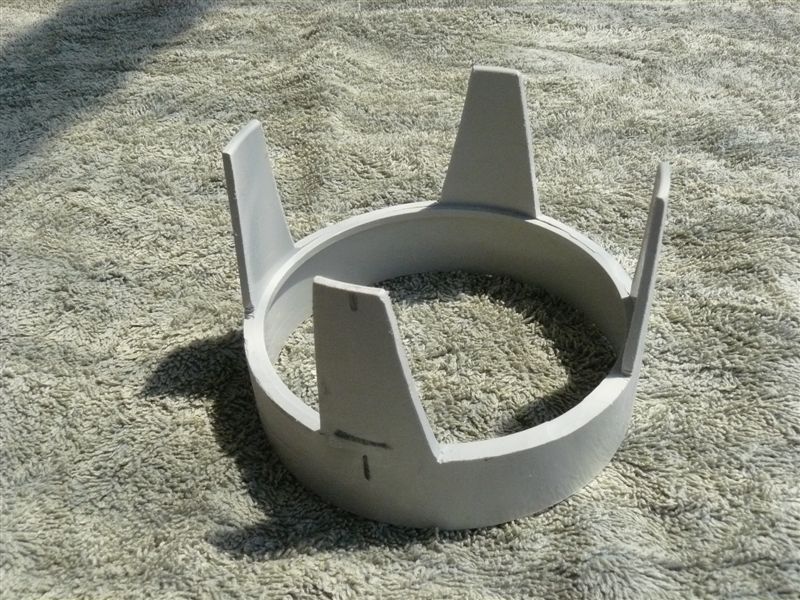
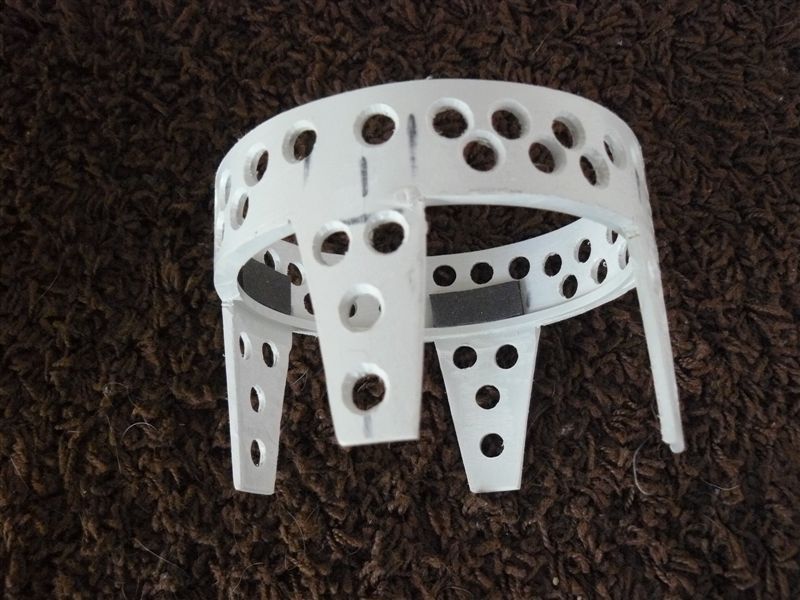
First job was to mark-out my cuts : my joiner had a threaded section at the top (but some don't though) so this needed to come off first, then at the other end of the joiner I marked-out the 4 leg positions...each leg centre at 9cm spacings as the circumference of the joiner was about 36cms. Leg bases were 2cm wide at at the top 4cms and the leg cuts going right to the base of the internal lip meaning 4 quite large panel were removed allowing good access for burner adjustement and shaving-off a fair bit of weight. Once 4 leg cut-outs were done I used the cordless drill and 8mm drill bit to drill-out some weight-reduction holes for the 4 legs and around the cirumference of the stand taking care no to drill thru the internal lip. A bit of a run-over all the holes from the outside with the countersink bit in the drill and a rub-over with some sandpaper and it was almost done.

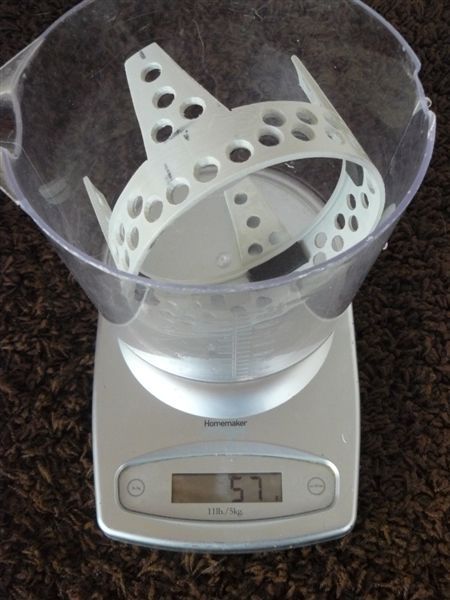
One final task was to fit-up 4 small tabs of 2mm sticky-back foam just above the internal lip and these allowed a good friction hold on the inverted gas cylinder....but it would also work fine without these as the base of the cannister just sits on the top of these foam tabs. A quick fit-up of the Moonwalker and all looked good....the leg cut-outs gave me plenty of room to get even my big paw in to adjust the stove, there was about 50mm of clearance between the stove fitting and the ground and if you wanted to use this holder with the cannister in the normal upright position then that worked too allowing you to keep the cylinder base off cold ground or mud/dirt etc. It felt pretty light but quite sturdy despite all the holes and big cut-outs and weighed just 57 grams on the kitchen scales so I think this will be a good addition to my winter backpacking kit.....and being so easy to make I'll knock-up a few more for spares. The pics below are pretty self-explainatory : and these are seriously easy to make if you're a bit of a DIY'er. Cheers

S358

100mm PVC pipe joiner :
Image

Image

Image

Threaded section off & basic leg cut-outs completed :
Image

Image

Holder with weight reduction holes & foam fitted :
Image

Nice & light :
Image

Inverted and upright cannister position options :
Image

Image

Image
sambar358
Athrotaxis cupressoides
 
Posts: 393
Joined: Sat 25 Oct, 2008 10:05 am

Re: DIY : Remote cannister stove stand

Postby Moondog55 » Sun 12 Jan, 2014 1:02 pm

That is really neatto
Ve are too soon old und too late schmart
Moondog55
Lagarostrobos franklinii
 
Posts: 11120
Joined: Thu 03 Dec, 2009 4:15 pm
Location: Norlane Geelong Victoria Australia
Region: Victoria
Gender: Male

Re: DIY : Remote cannister stove stand

Postby GPSGuided » Sun 12 Jan, 2014 1:50 pm

Clever adaptation.
Just move it!
User avatar
GPSGuided
Lagarostrobos franklinii
 
Posts: 6803
Joined: Mon 13 May, 2013 2:37 pm
Location: Sydney
Region: New South Wales

Re: DIY : Remote cannister stove stand

Postby neilmny » Sun 12 Jan, 2014 5:06 pm

Sambar, you are an ideas man, that's great.
User avatar
neilmny
Lagarostrobos franklinii
 
Posts: 2576
Joined: Fri 03 Aug, 2012 11:19 am
Region: Victoria
Gender: Male

Re: DIY : Remote cannister stove stand

Postby Mark F » Sun 12 Jan, 2014 5:57 pm

Great idea Sambar!

I was playing with my cookset today trying to reduce it's bulk and discovered that 1 kg Jalna yoghurt pots are a perfect fit around a 230 g canister. I cut one down to be a 550ml mug (on the right), it slips over the canister and packs with the stove, lighter and windshield into my 900 ml pot. On seeing your idea I grabbed another Jalna pot and cut it at the other end and sliced a couple of slits in it. Same function but now 30 grams. Now to punch it full of holes. Many thanks for the idea.

P1000922.JPG
"Perfection is attained not when there is nothing more to add, but when there is nothing more to remove".
User avatar
Mark F
Lagarostrobos franklinii
 
Posts: 2299
Joined: Mon 19 Sep, 2011 8:14 pm
Region: Australian Capital Territory
Gender: Male

Re: DIY : Remote cannister stove stand

Postby sambar358 » Sun 12 Jan, 2014 6:34 pm

Good job there Mark.....nothing like a bit of lateral thinking 'eh.....pity that I'm not a yoghurt fan or I may have gone that way too but that container looks to be made for the job for sure.

With your left holder I'd probably trim the top down a bit so that when the cannister is inserted with normal orientation your have bit of clearance for the hose fitting which will enable you to use the cannister fitted into the stand hose-up too with the gap at the bottom providing a bit of cannister clearance on cold, wet or muddy ground. Cheers

s358
sambar358
Athrotaxis cupressoides
 
Posts: 393
Joined: Sat 25 Oct, 2008 10:05 am


Return to Make Your Own Gear

Who is online

Users browsing this forum: No registered users and 3 guests